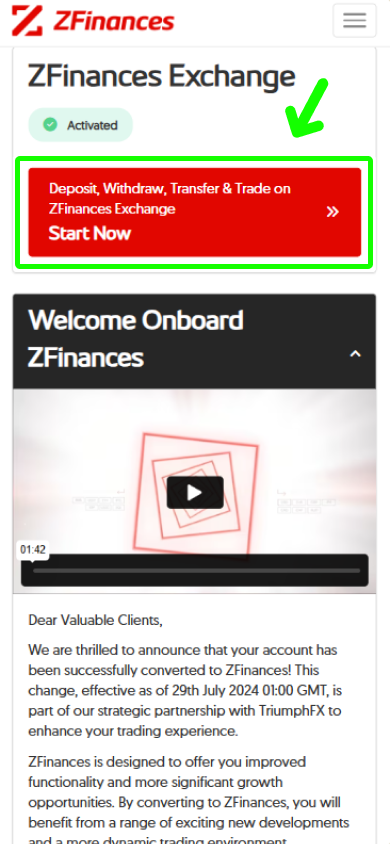
Step 1
First, login to your ZFinances Trader’s Room account. Then, click Start Now button to access the ZFinances Exchange homepage once you’ve activated your exchange account.
**If you haven’t activated your account yet, you may click here to see how.**

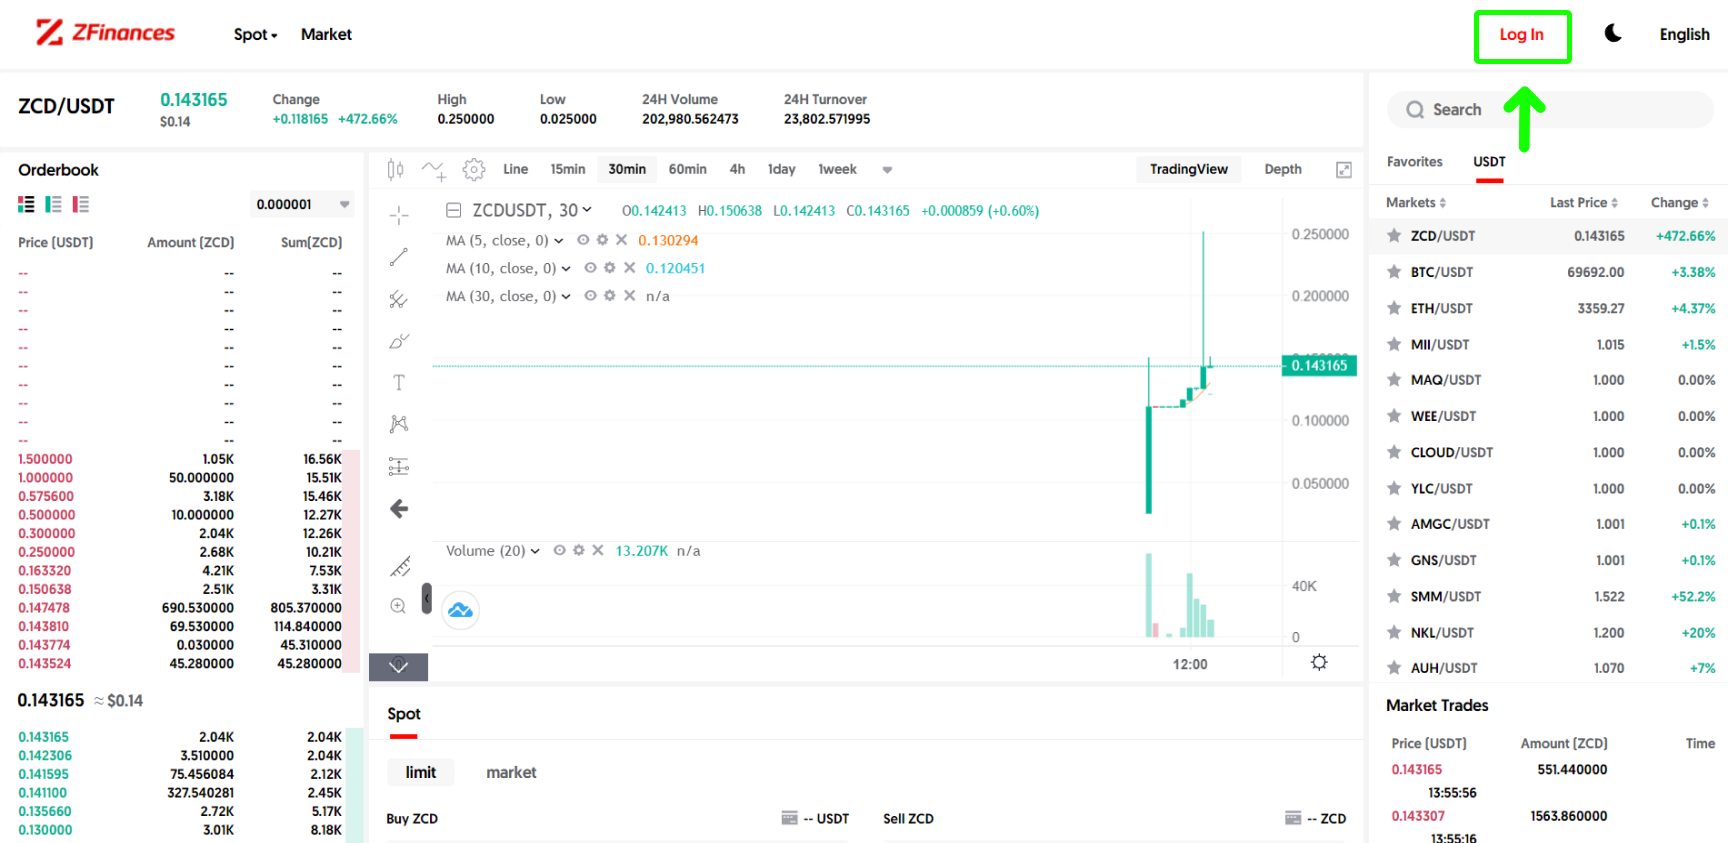
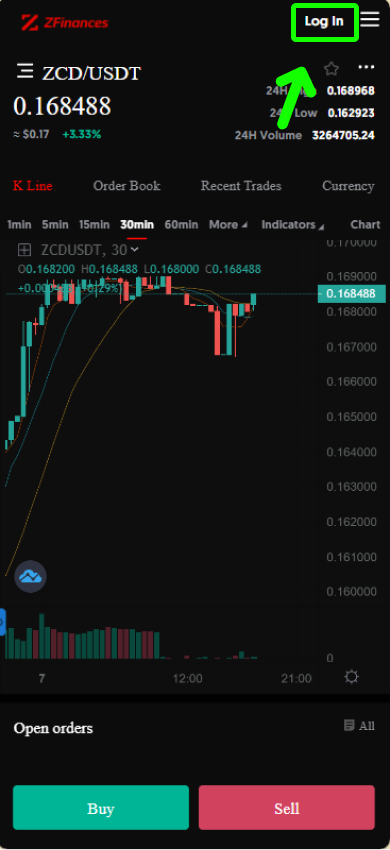
Step 2
Head to the top right corner of the ZFinances Exchange homepage and click on the Log In button.
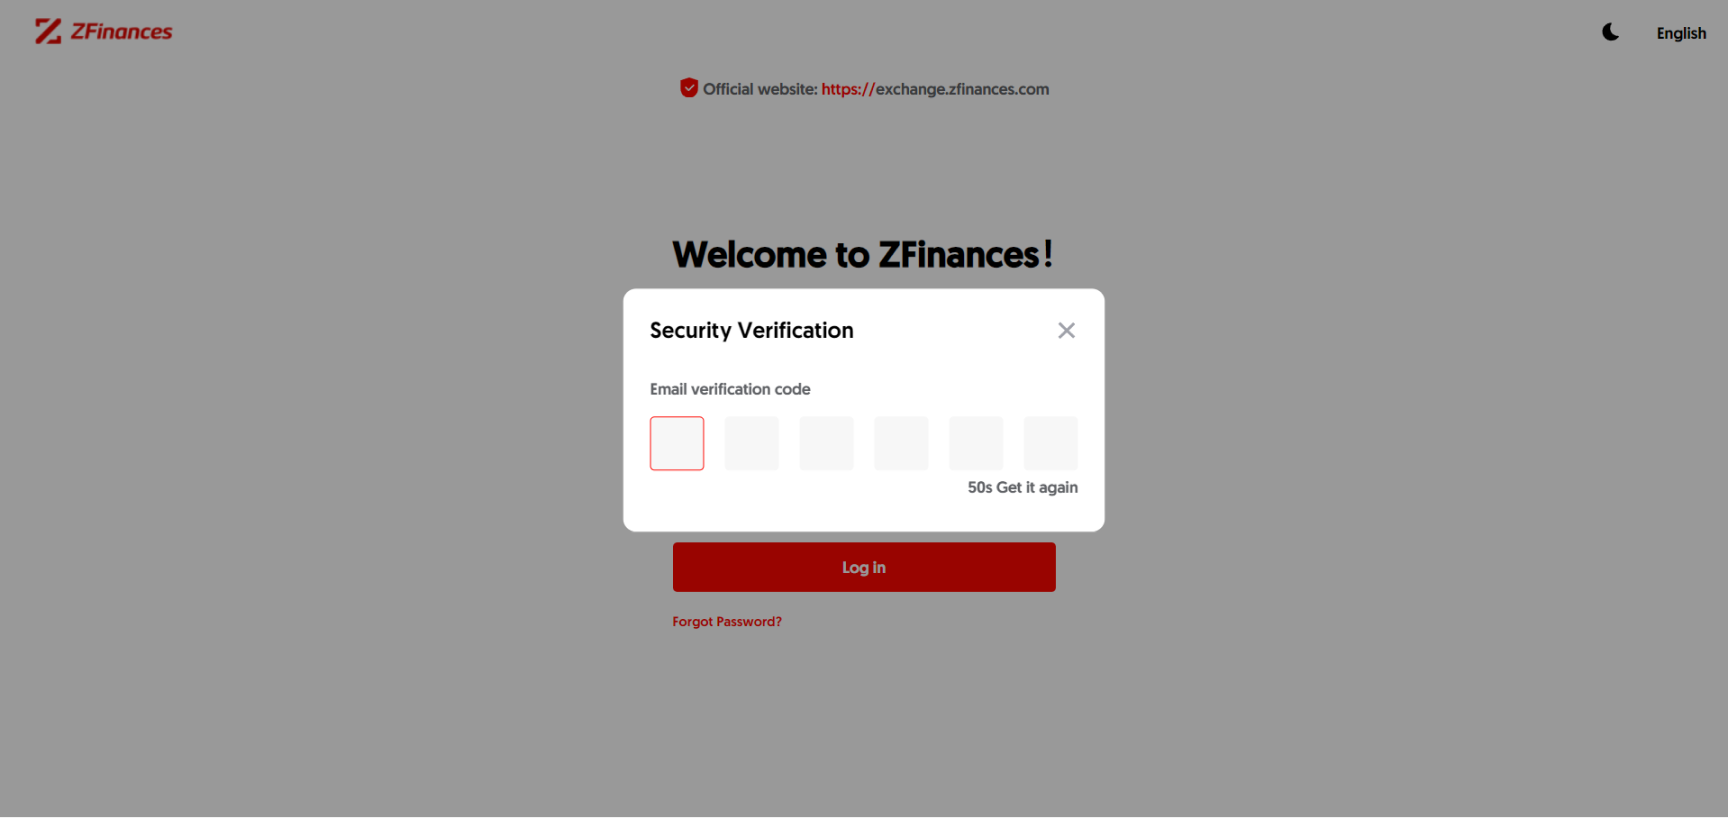
Step 3
To login, use the same email you’ve registered. You may also obtain the email verification code from the email you’ve used to register.
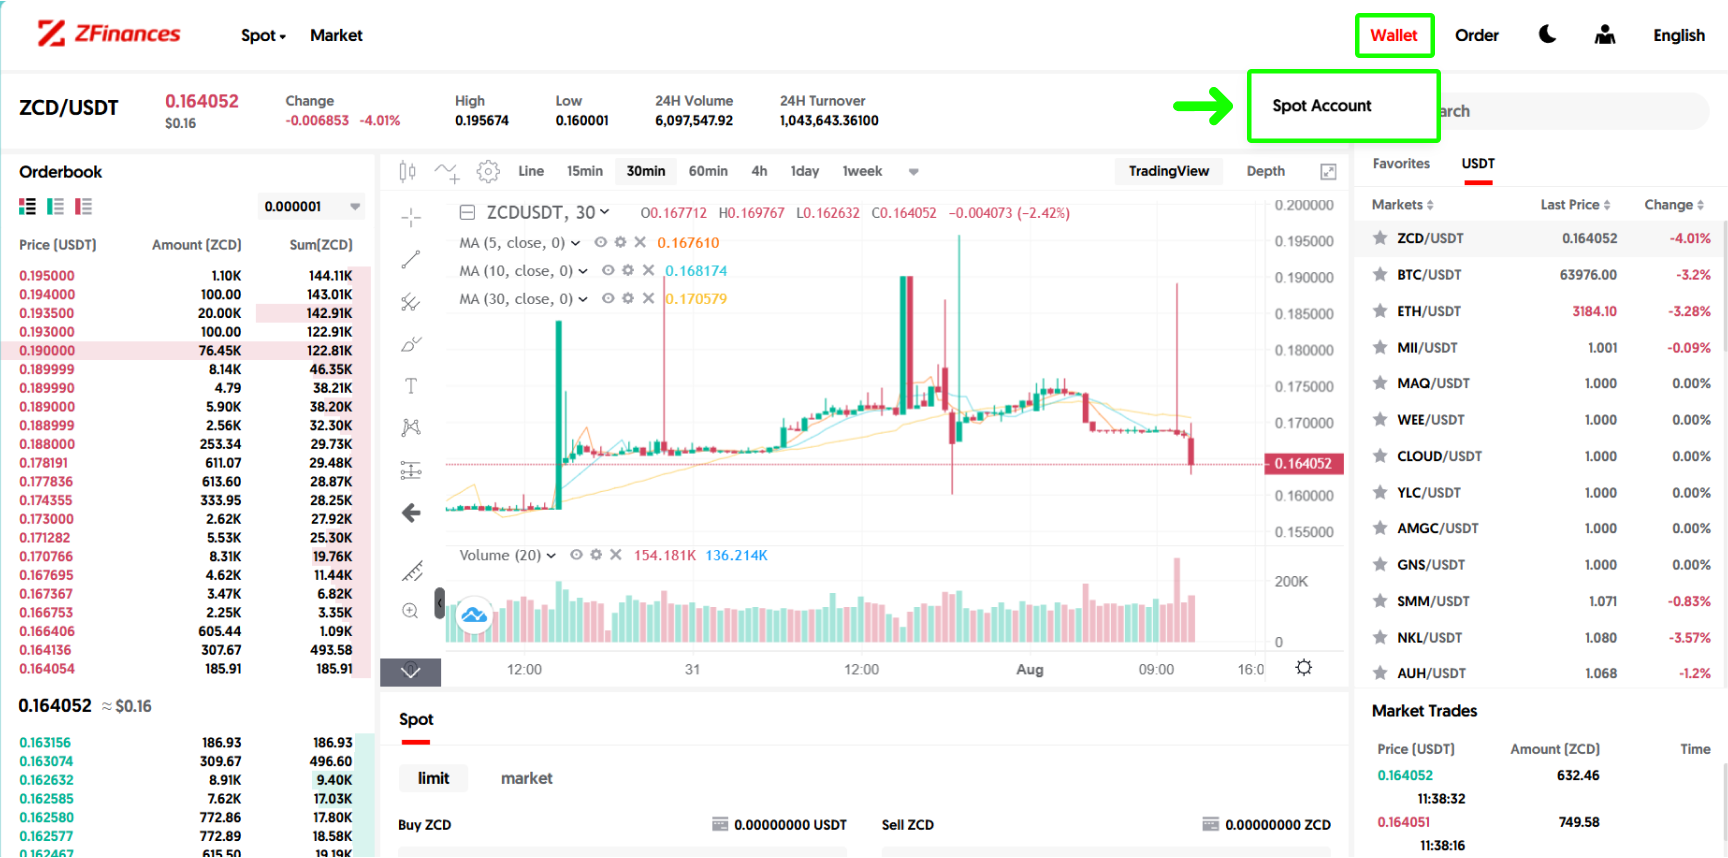
Step 4
Then, click on the Spot Account under Wallet at the top right corner of the ZFinances Exchange homepage.
Step 5
Select Withdraw.

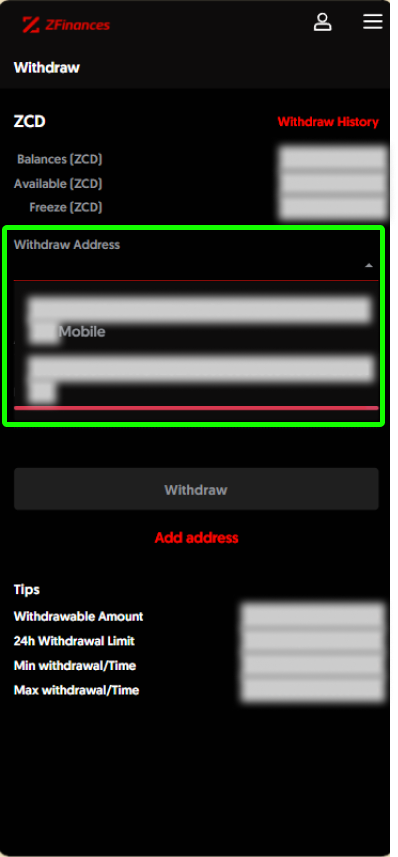
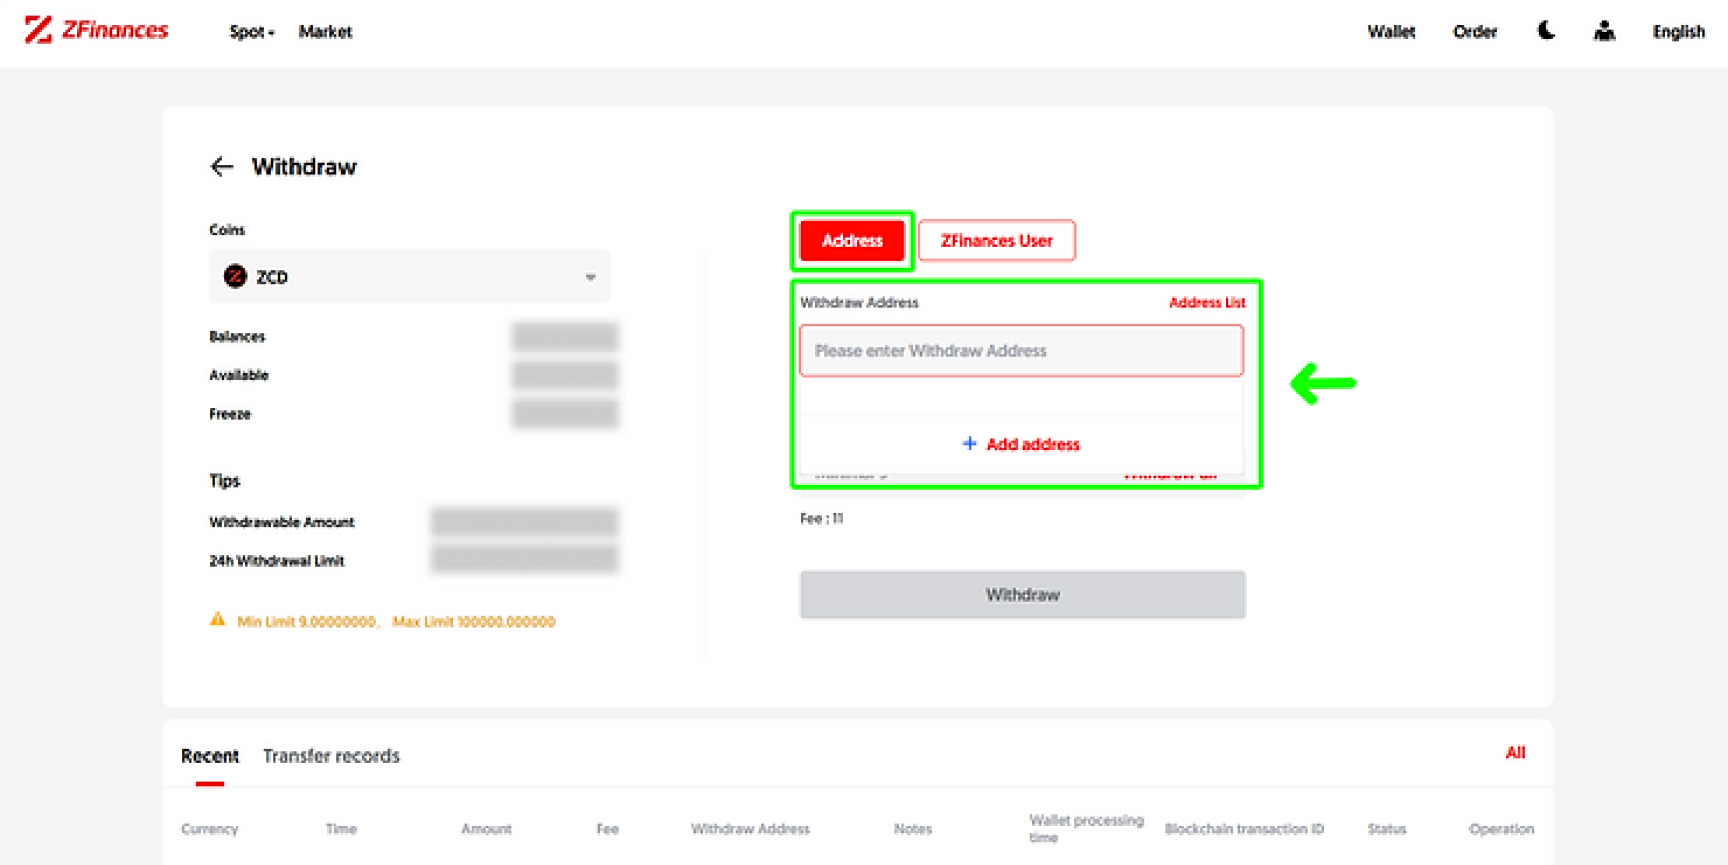
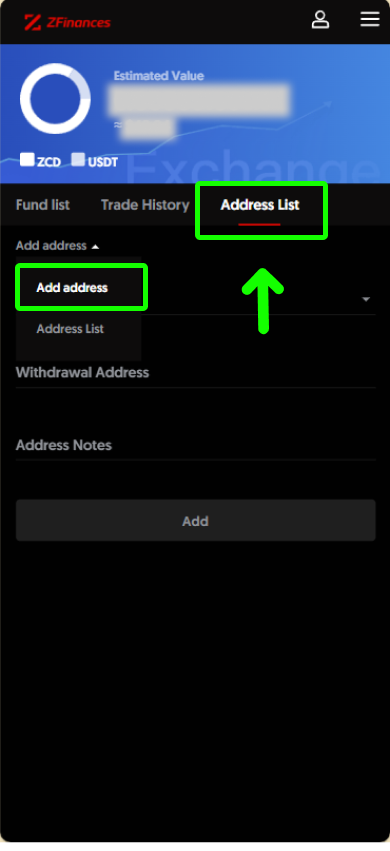
Step 6
At Address page, to add address list, click on the Withdraw Address’s empty field. Then, click on Add Address at the drop- down menu.
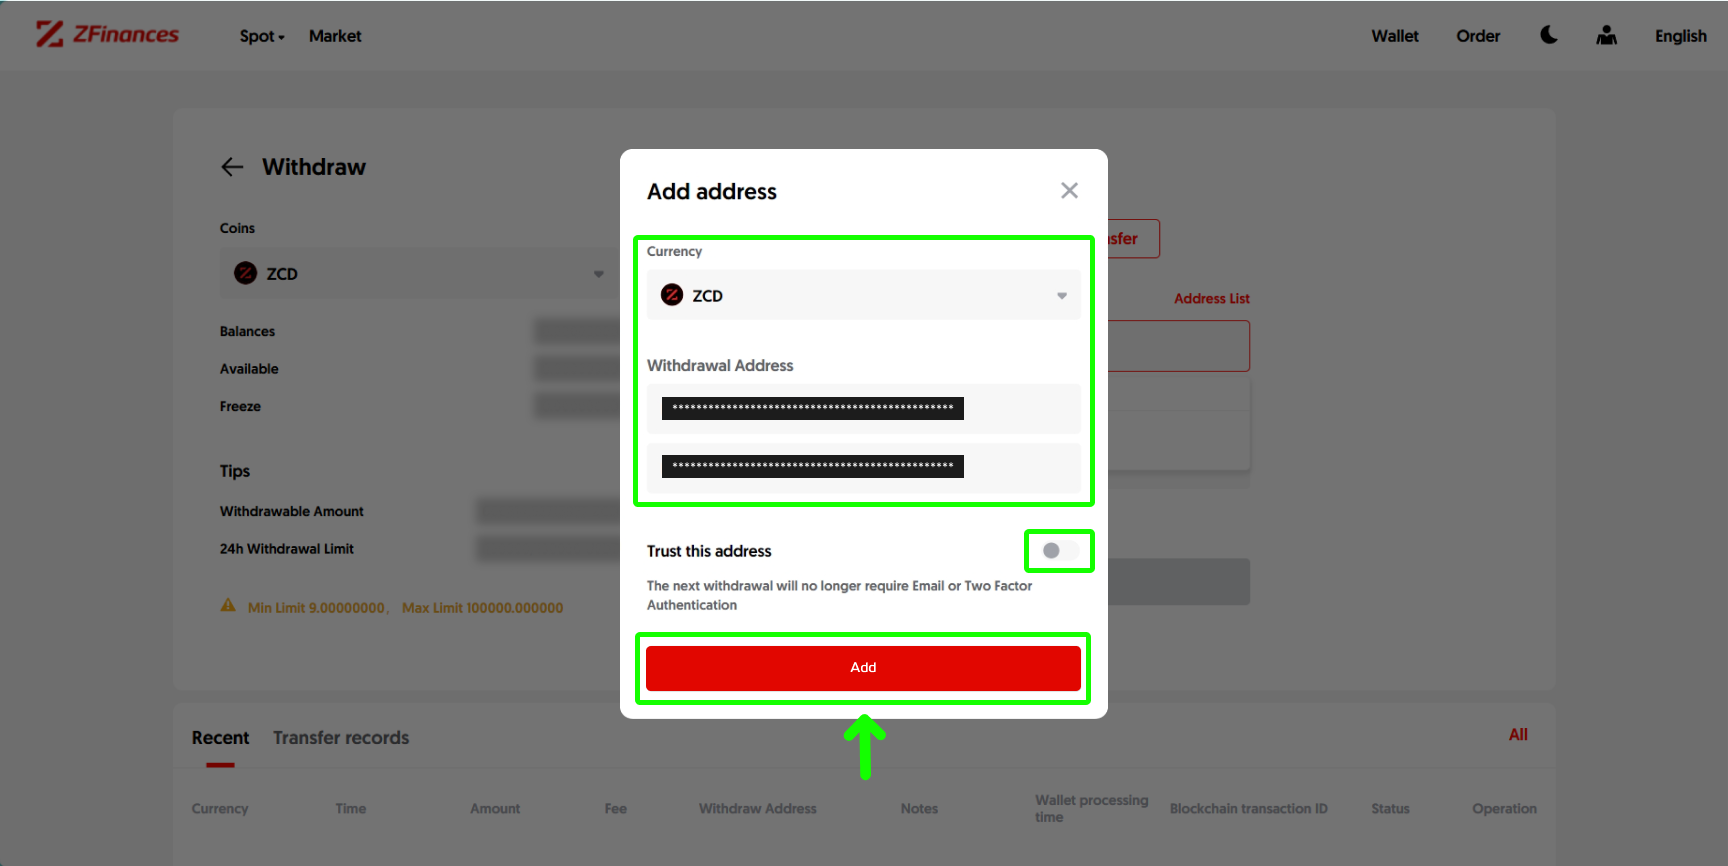
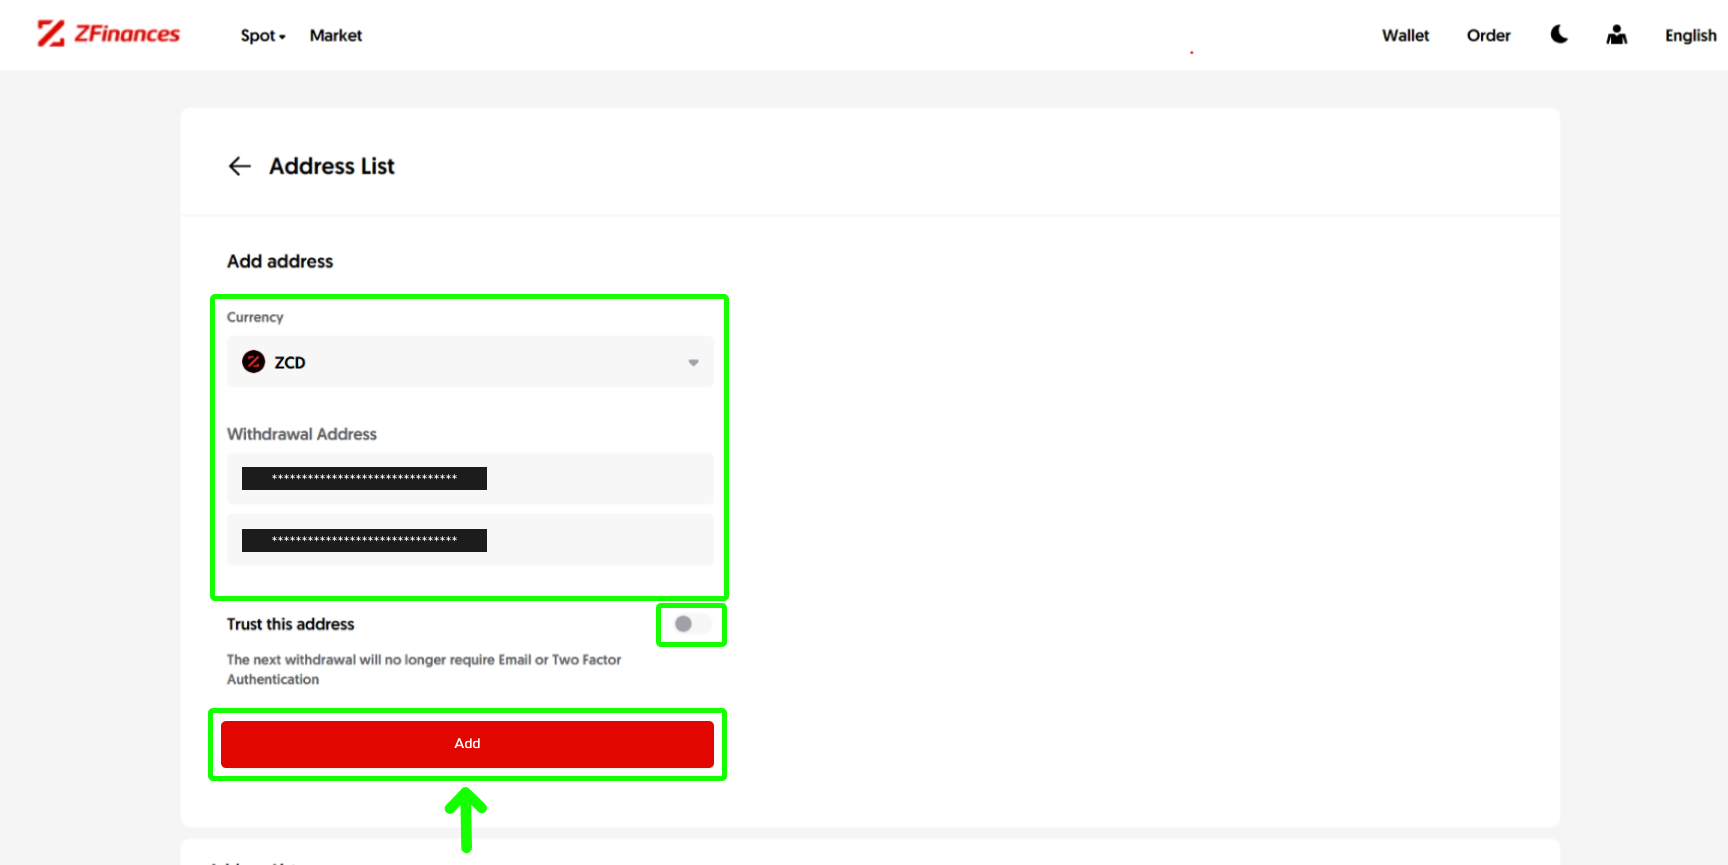
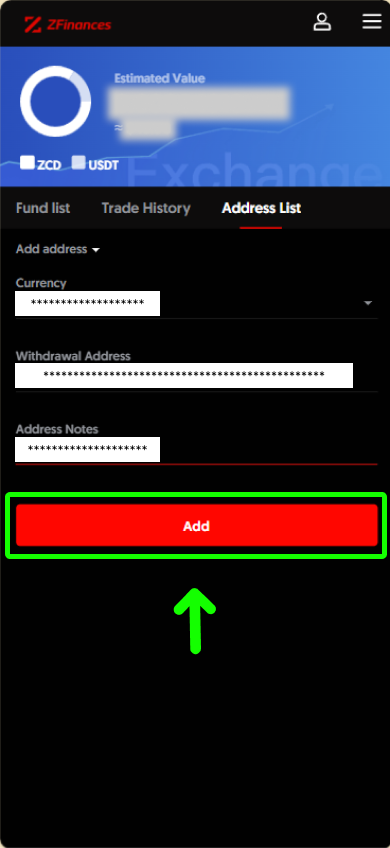
Step 7
At this step, select the coins of your choice, provide all necessary information, and then proceed by clicking on the Add button.
**You may turn on the Trust this address switch at your own risk.**
**Saving the address as ZCD coin means you’ll only have access to the ZCD address list.**
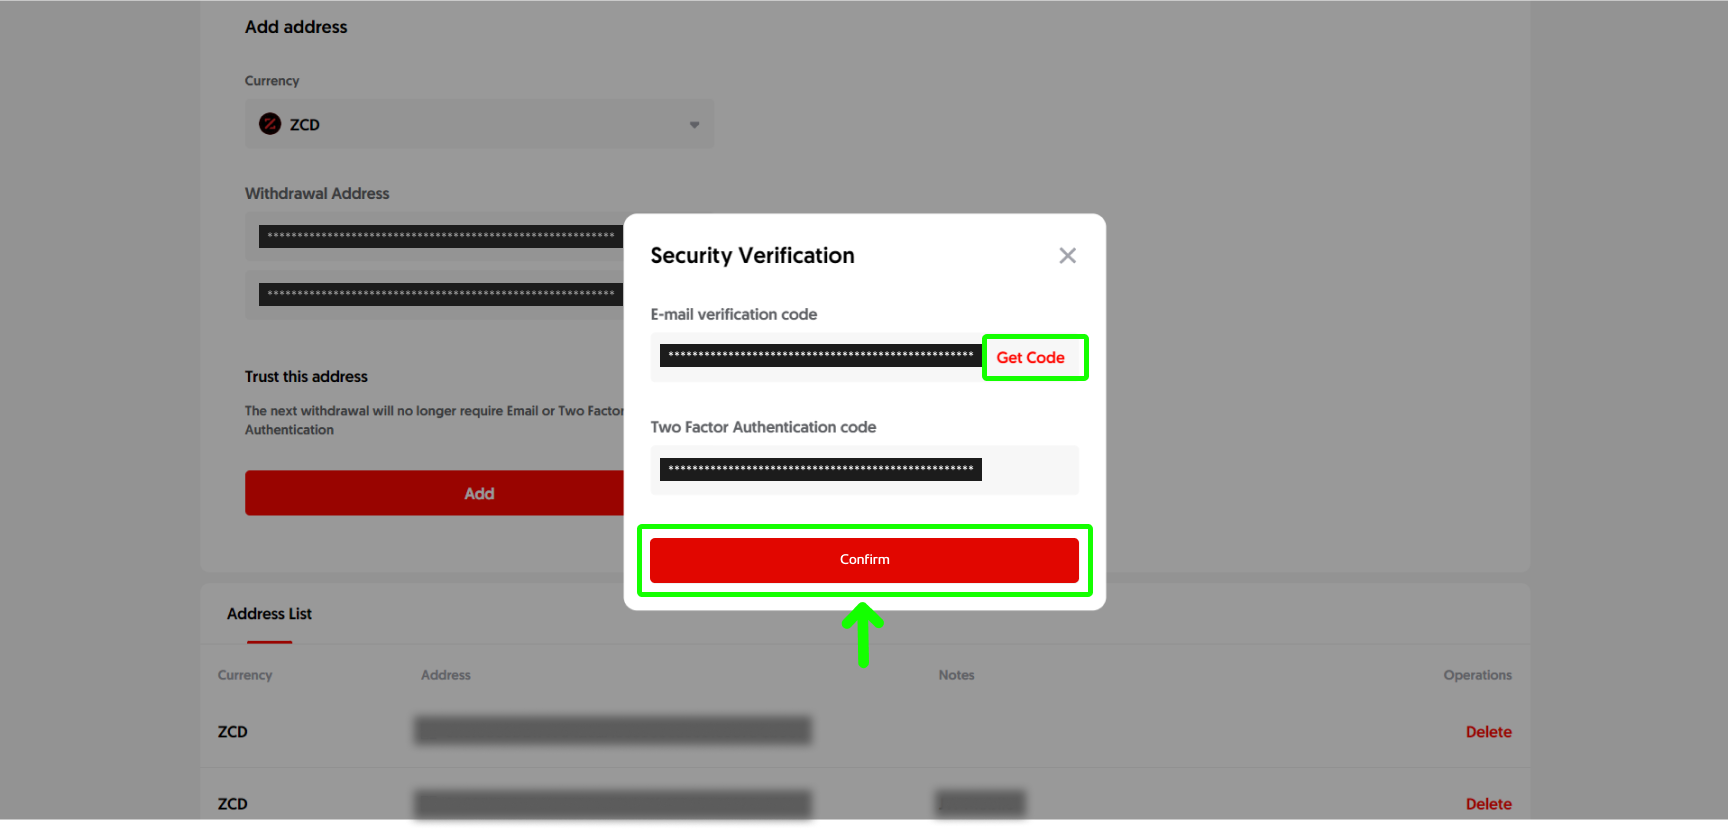
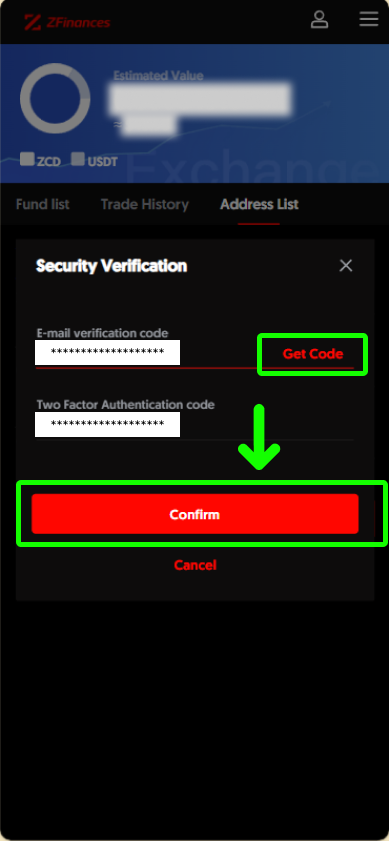
Step 8
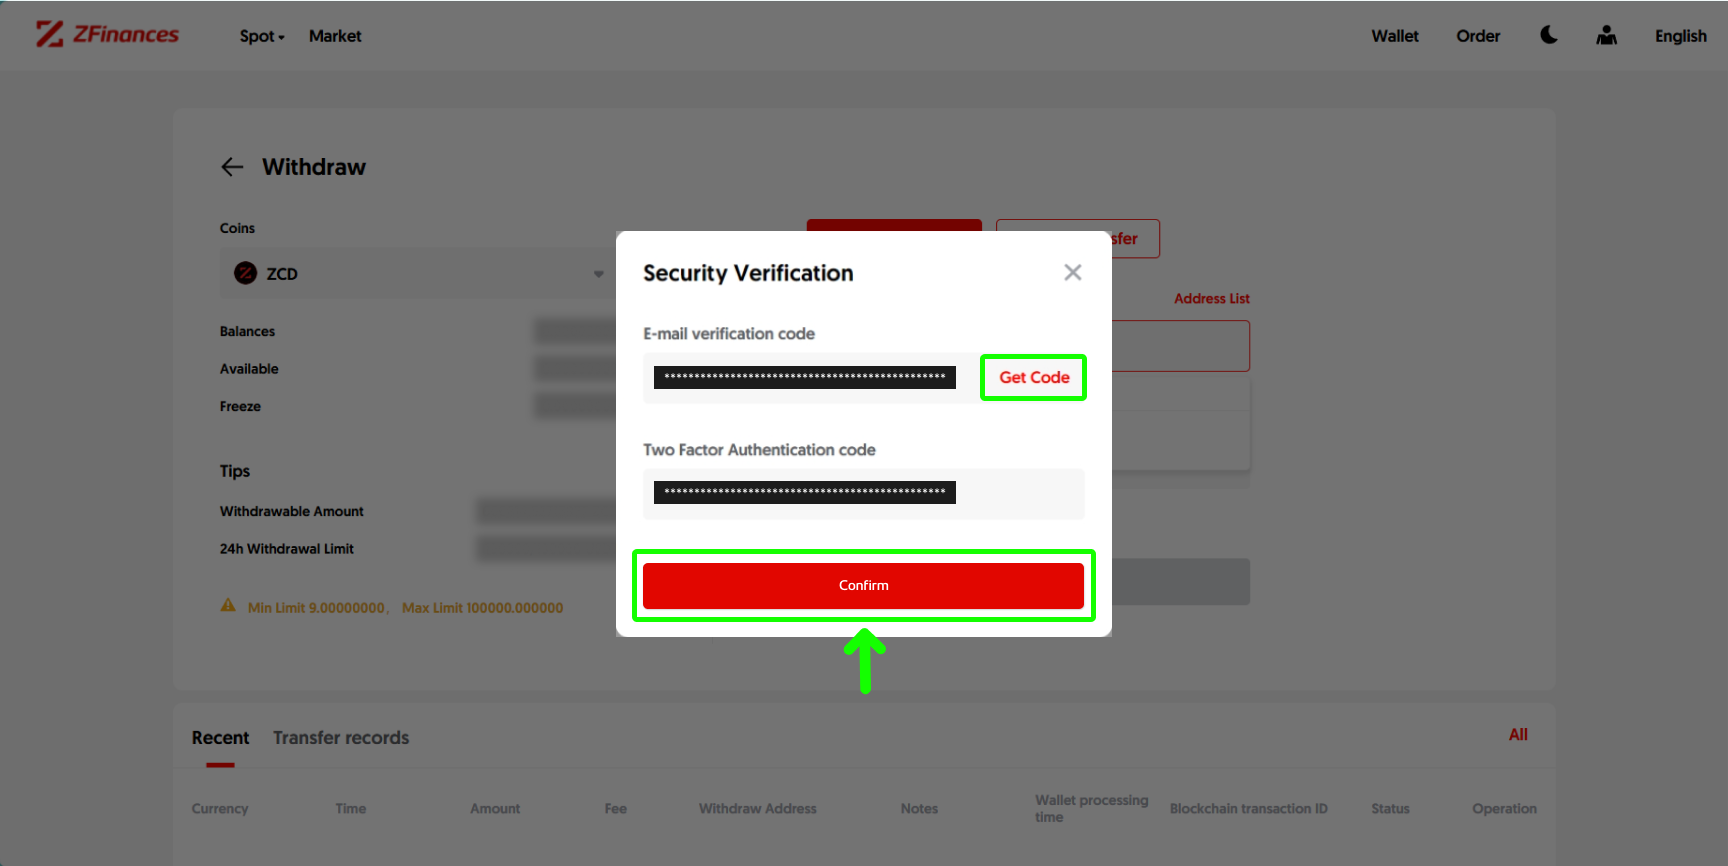
Click on Get Code and enter the email verification code along with the Two Factor Authentication code, then click on Confirm. You’re done!
**You may get your Google authenticator code from the Google authenticator app and email verification code from your email.**
Step 9
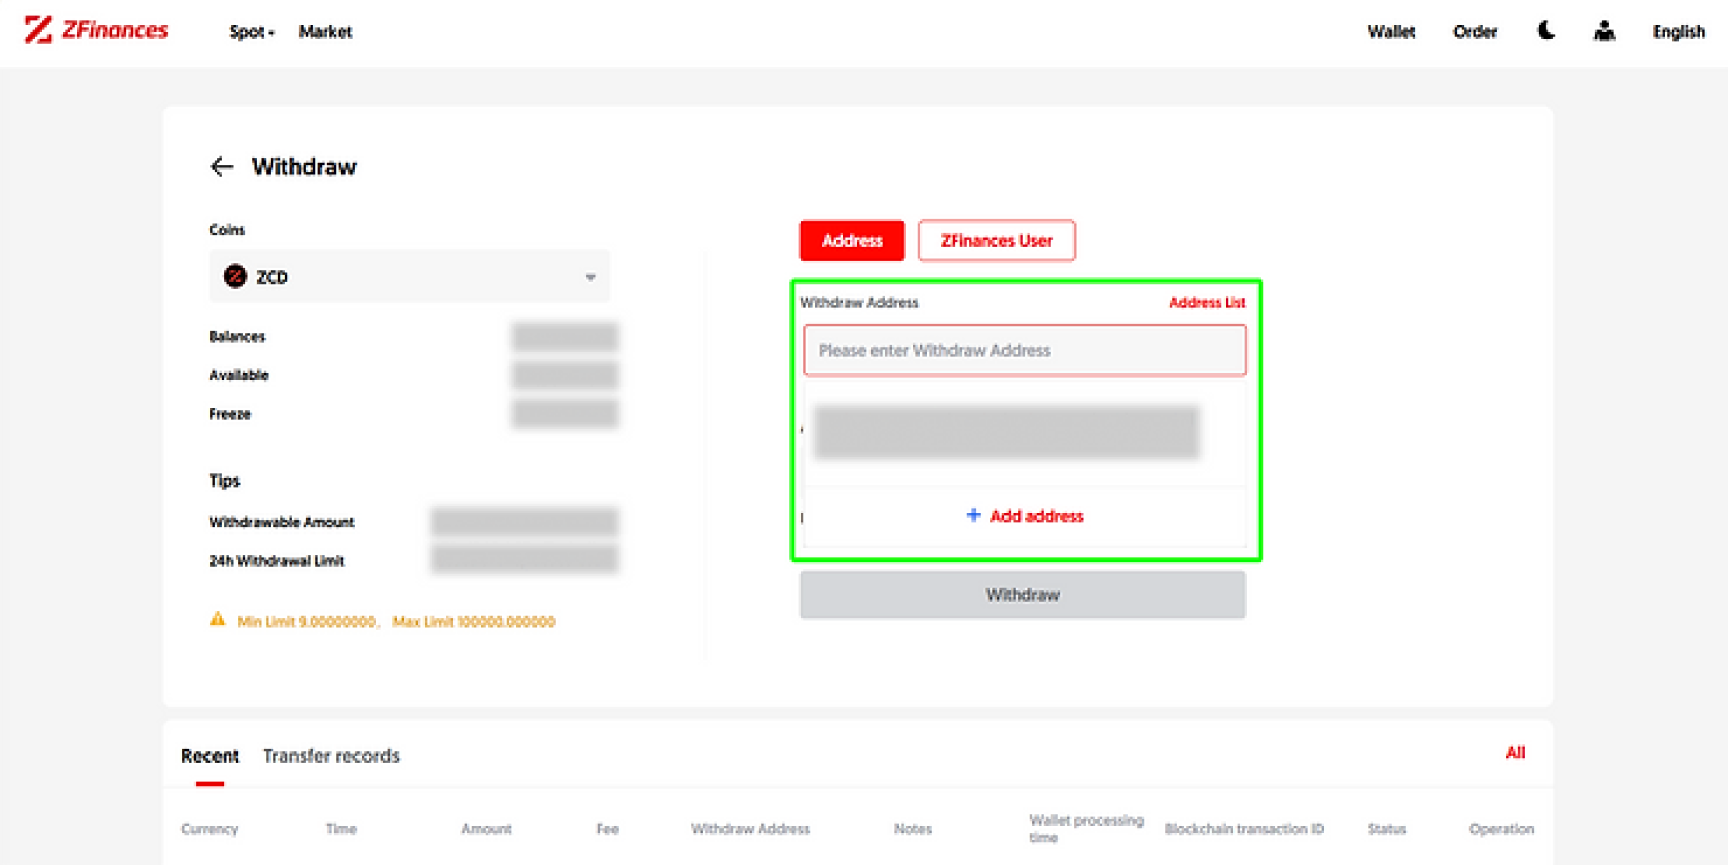
Once the address list has been added, you can view it from the drop- down menu.
**Not sure how to perform Normal Withdraw? You may click here to see how.**
OR
Step 1
At the Address page, you may also click the Address list.

Step 2
At this step, select the coins of your choice, provide all necessary information, and then proceed by clicking on the Add button.
**You may turn on the Trust this address switch at your own risk.**
**Saving the address as ZCD coin means you’ll only have access to the ZCD address list.**
Step 3
Click on Get Code and enter the email verification code along with the Two Factor Authentication code, then click on Confirm. You’re done!
**You may get your Google authenticator code from the Google authenticator app and email verification code from your email.**
Step 4
Once the address list has been added, you may view it from Address List widget.

Step 1
First, login to your ZFinances Trader’s Room account. Then, click Start Now button to access the ZFinances Exchange homepage once you’ve activated your exchange account.
**If you haven’t activated your account yet, you may click here to see how.**
Step 2
Head to the top right corner of the ZFinances Exchange homepage and click on the Log In button.
Step 3
To login, use the same email you’ve registered. You may also obtain the email verification code from the email you’ve used to register.

Step 4
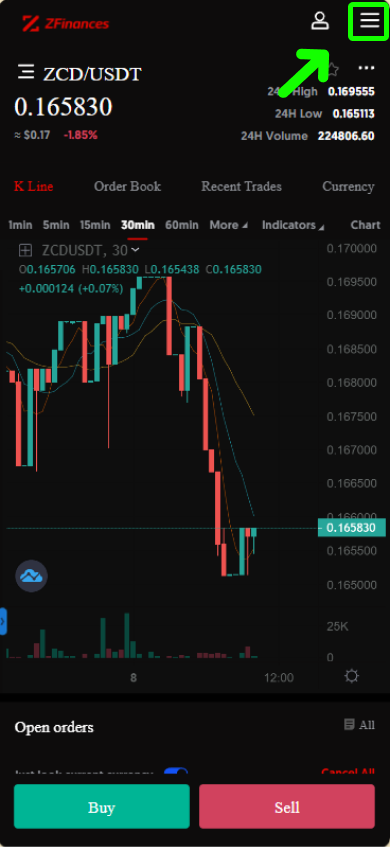
Then, click on the menu at the top right corner of the ZFinances Exchange homepage.
Step 5
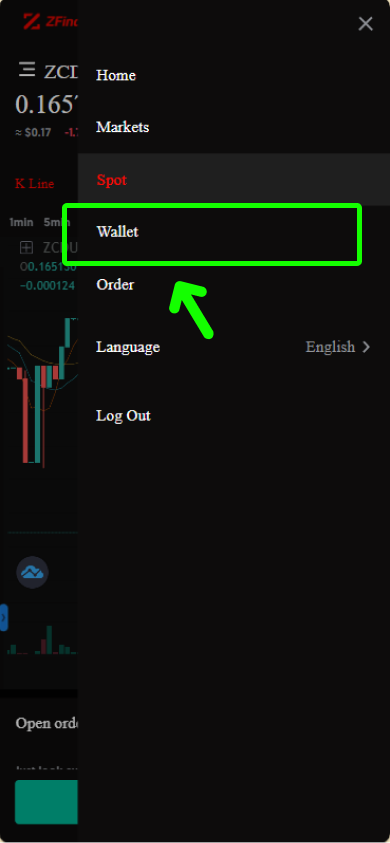
Select Wallet.
Step 6
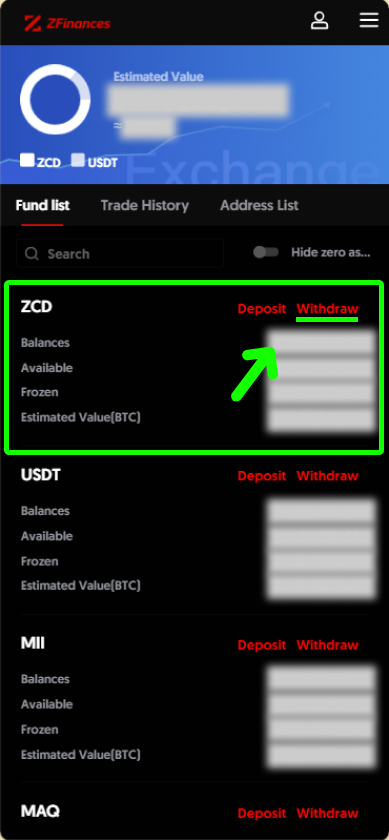
Select the coins of your choice and click on Withdraw.
Step 7
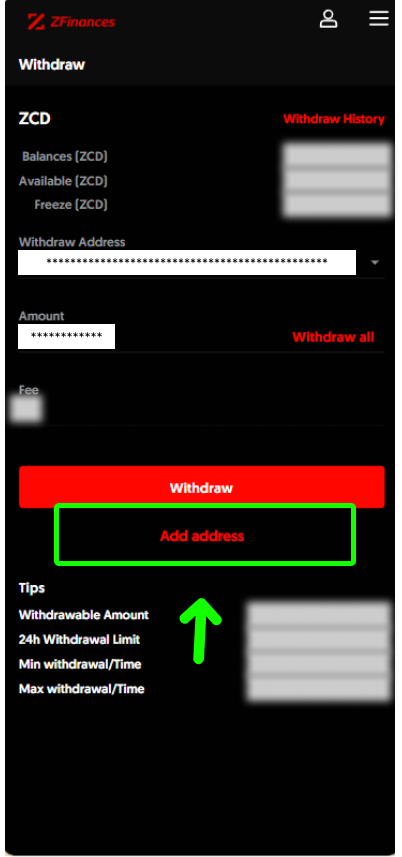
At this step, click on Add address.
Step 8
Provide all necessary information, and then proceed by clicking on the Add button.
**Saving the address as ZCD coin means you’ll only have access to the ZCD address list.**

Step 9
Click on Get Code and enter the email verification code along with the Two Factor Authentication code, then click on Confirm. You’re done!
**You may get your Google authenticator code from the Google authenticator app and email verification code from your email.**
Step 10
Once the address list has been added, you can view it from the drop-down menu.
**Not sure how to perform Normal Withdraw? You may click here to see how.**

OR
Step 1
At the Wallet page, you may also click the Address list and select Add Address.
Step 2
At this step, select the coins of your choice, provide all necessary information, and then proceed by clicking on the Add button.
**Saving the address as ZCD coin means you’ll only have access to the ZCD address list.**
Step 3
Click on Get Code and enter the email verification code along with the Two Factor Authentication code, then click on Confirm. You’re done!
**You may get your Google authenticator code from the Google authenticator app and email verification code from your email.**

Step 4
Once the address list has been added, you may view it from Address List widget.